From realizing I am not doing too much in my life, to realizing that maybe I don't want to, and dealing with all of this inner turmoil by spending about $100 on Ebay on Sailor Moon things and cheap jewelry.

After my inner searching subsided a bit, and most of my packages arrived, I sat down for about 3 days and watched the first 40 or so episodes of Sailor Moon. Being in Japanese, they required a lot of attention, and I was less productive than ever. Watching the group of girls who molded my childhood, and pretty much made me the person I am today, I couldn't help but feeling as though I was letting them down.
Now, I realize what this sounds like. 23 Year Old girl letting down imaginary characters, but it worked, right? Another bout of inner turmoil began and I ended up somewhere I think I've been all along.
I like this stuff. I like crocheting, and anime, and games and whatever else most 23-year-old women shouldn't really find themselves obsessed with. But then I realized that if I'm going to use this stuff to make me happy, I still have to work hard.
After everything made itself crystal clear to me, I suddenly had a burst of energy, inspiration and nostalgia hit me like a ton of bricks.
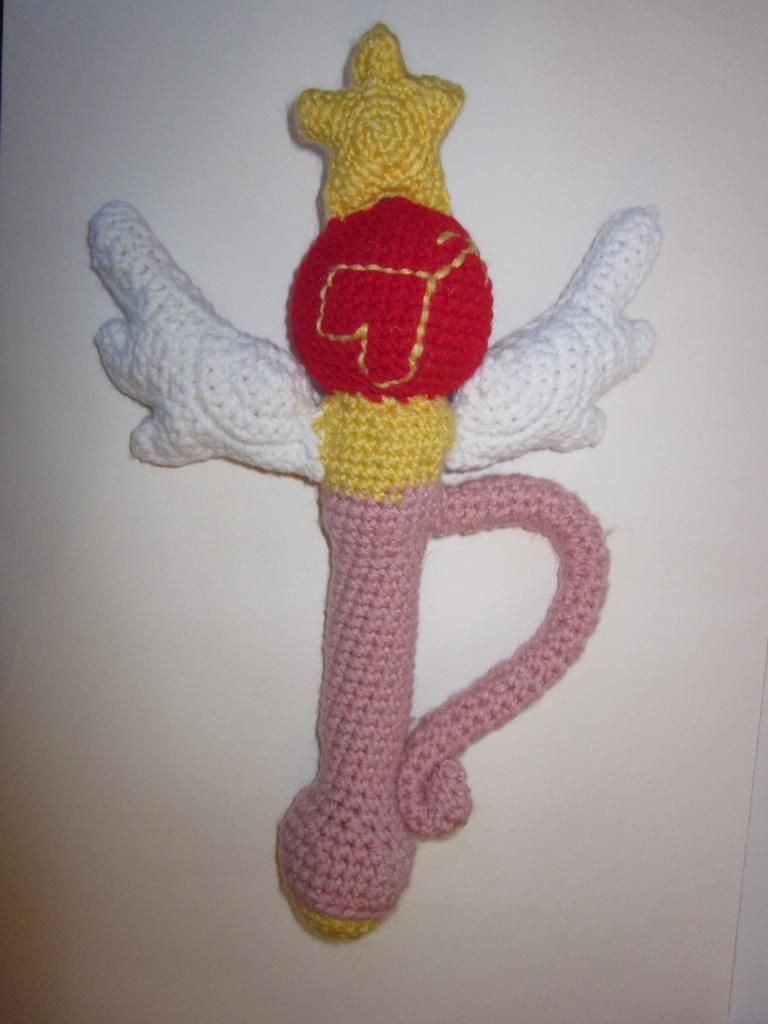
When I was younger, I used to try to cut out cardboard in the shape of these transformation wands to use when I played sailor Moon with my best friend. They were always flimsy, uneven, a little too small, and covered in marker. I started to think about that time in my life, how happy I was, being in my own world all the time, and I wanted to have that back, if only on a small level. Remembering this, and about the fact that I would LOVE to make my own pattern, I immediately started drawing up plans, and around 3:30 AM yesterday, I started crocheting this.
I had SO MUCH FUN making this. I reminisced, I problem-solved, and upon finishing the first wing I felt full from how smart I was feeling. The wings were completely my creation, and I couldn't be more proud. I hope when you make this, you feel as stuffed with nostalgia, magic, love and justice as I did.
Since this is a bit of a prototype, I am offering this pattern for free, but please respect me and the time, energy and planning that went into this creation. I don't mind if you sell items from this pattern, but on 2 conditions:
1. PLEASE get my permission when you sell any creations from this pattern (gifting and trading is fine, of course)
2. I wanna see! Show me your finished product, and let me know where the pattern confused you, or was incorrect. I have only made this once, and some proxy-pattern-testers would be very helpful to me. It is the biggest reason I am offering this pattern for free. Also, I would LOVE to see that other people are finding inspiration and fun from something I created in a very pivotal 3 AM moment.
So, with inner turmoil behind me, 4 seasons of Sailor Moon ahead of me, and a very comforting Sailor Mars transformation wand beside me, please enjoy this pattern.
Eternal Sailor Scout Transformation Pen
Designed
by Pam Gabriel
Sailor
Moon and Sailor Scouts (TM) Naoko Takeuchi
This
pattern can be used to gift or trade with friends and family, but
please do not sell products from this pattern without my permission.
This
pattern is for the transformation wands the Inner Scouts use in
Sailor Moon Super S & Sailor Moon Stars seasons. Hopefully I will
have patterns for the other Transformation pens soon.
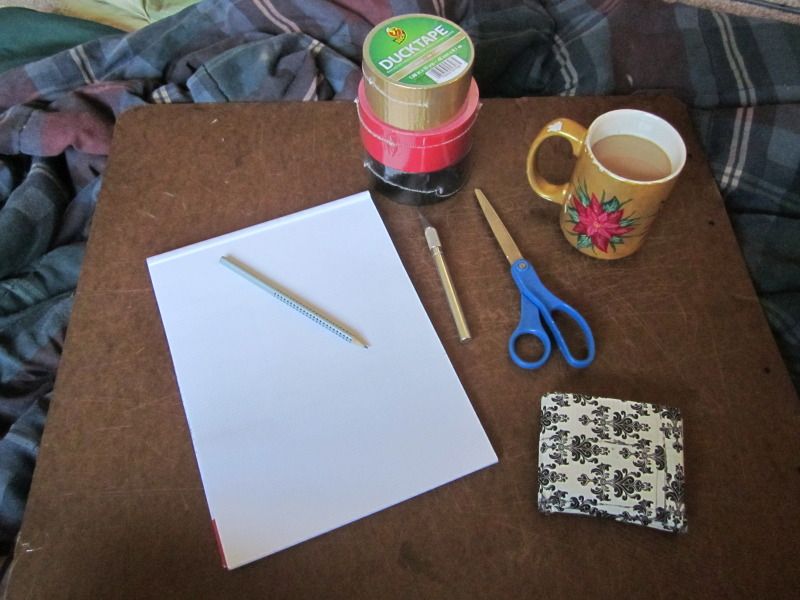
What
you'll need:
- E Hook
- H Hook
- Tapestry Needle
- Less than a skein of worsted weight yarns in:
- Yellow
- Color of your choice depending on the Scout wand you are making (Blue, Red, Green or Orange).
- Pink
- White
- Polyfil, or other stuffing.
Abbreviations:
- Chain (Ch)
- Single Crochet (Sc)
- Single Crochet Increase (scinc)
- Single Crochet Decrease (scdec)
- Slip Stitch (sl st)
- Half Double Crochet (hdc)
- Double Crochet (dc)
Final
Dimensions:
Height
(From top of star to bottom of stick): 12 ½"
Width
(From wing tip to wing tip): 8 ¼"
Handle
circumference: 3.75"
Star
height: 2 ½"
Sphere
circumference: 8"
Wing
(From base to tip of Feather #1): 5"
This
wand will be made in 5 parts (Star, Sphere, Stick, Handle and Wings),
then sewn together. We will start with the star, and work our way
down.
Let's
get started!
Star
(Make 2):
Using
E Hook, and Yellow Yarn:
Rnd
1: Using the Magic Adjustable Ring technique, make 5 sc in loop. Do
not join.
Rnd 2: Make 2 sc in ea sc around (10 sc). Do not join.
Rnd 3: *Sc in first sc, 2 sc in next sc* around (15 sc). Join with sl st in first sc. Circle complete.
Rnd 4: Sl st in 1st sc. *[Ch5, sl st in 2nd lp from hook, sc in next st, hdc in next st, dc in next st] point made. Sk next sc in circle and sl st in next 2 sc. Rep from * around circle, after last point, make only 1 slst.
Rnd 5: Ch 1, sc in ea st around (50 sc).
Fasten off, and weave in ends..
Putting
the Star together:
With
wrong sides facing each other (right sides facing outwards), sew
together the outer loops only, using a whip stitch. Fill with
stuffing before sewing together last point. Make sure stuffing is
evenly distributed throughout points. Finish Sewing together. Weave
in end(s).
Sphere:
Using
H Hook, and Sailor Scout's Main Color (Blue for Mercury, Red for
Mars, Green for Jupiter or Orange for Venus):
Row
1: Ch 2. 6 Sc in second Ch from hook. (6 sc)
Row
2: inc in each stitch around. (12 sc)
Row
3: Add 5 scincs evenly throughout the row (17 sc)
Row
4: Add 6 scincs evenly throughout the row (23 sc)
Row
5: Add 4 scincs evenly throughout the row (27 sc)
Row
6: Add 4 scincs evenly throughout the row (31 sc)
Row
7: Add 3 scincs evenly throughout the row (34 sc)
Row
8: Add 2 scincs evenly throughout the row (36 sc)
Row
9: Add 1 scincs within the row (37 sc)
Row
10: One sc in each sc (37 sc)
Row
11: Decrease by 1 (36 sc)
Row
12: Evenly scdec by 2 within the row (34 sc)
Row
13: Evenly scdec by 3 within the row (31 sc)
Row
14: Evenly scdec by 4 within the row (27 sc)
Row
15: Evenly scdec by 4 within the row (23 sc)
Row
16: Evenly scdec by 6 within the row (17 sc)
Row
17: (scdec, sc) repeat () around (12 sc)
(This
is a good time to fill your sphere with Polyfil.)
Row
18: 6 scdec (6 sc)
Fasten
off. Weave loose end through each stitch in the opening. Pull tightly
to close.
Putting
the Star and Sphere together:
First
we're going to add the star to the sphere. Do this BEFORE
embroidering your Scout's symbol on the sphere. There is a good
chance the angle of your star may be changed as you attach it, and
you don't want a weird wand. I did this by running yellow yarn up
from the sphere, through the star, then under one stitch of the
sphere, coming right back up to go through the star again. It's
pretty tricky, so play around with what works for you. After I
attached the 1st point of the star, I pulled my yarn all
the way through to the bottom of the sphere (the Stick will be
attaching here, so it doesn't need to be pretty), then pulling it
back up to the top. When I brought it back up, I made sure to line it
up where the star was going to be sewed down to, so it wouldn't be
crooked, then continued to sew down the second Star Point.
To
weave in the ends, I brought both ends down to the bottom of the
sphere and tied them off.
 |
| Bring the yarn down from the right Star Point to the bottom |
 | ||||
| You can see the top of the (light blue) needle where I brought the yarn back up to the top, and through the left Star Point |

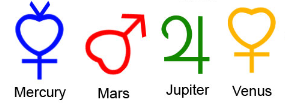
Embroidering:
True
to the Wands when the Scouts transform, their symbol appears in gold,
so I'll be using yellow as well. I'm also only using the Planet
Symbol. If you're feeling ambitious, feel free to add the extra
symbol (Harp, Bow & Arrow, Laurels, or Hearts, depending on your
chosen scout).

 |
| Sailor Mars FTW. |
Stick:
Stick
is made from the bottom.
Using
Yellow and H Hook:
Row
1: Ch 2, 6 sc in 2nd ch from hook (6 sc)
Row
2: 2sc in each sc (12 sc)
Row
3: (2sc, sc, sc) around (16 sc)
Row
4: (sc, sc, sc, 2sc) around (20 sc)
Row
5: sc in each sc (20 sc)
Switch
to Pink.
Row
6: In FL only, (sc, sc, sc, 2sc) around (25 sc)
Row
7: In BL only, (sc, sc, sc, sc, 2sc) around (30 sc)
Row
8: In both loops, sc in each sc (30 sc)
Row
9: (sc, sc, sc, scdec) around (25 sc)
Row
10: Repeat row 9 (20 sc)
Row
11: Repeat row 9 (16 sc)
Rows
12 - 31: Sc in each sc (16 sc)
Row
32: (sc, sc, sc, 2sc) around (20 sc)
Row
33: (9 sc, 2sc) twice (22 sc)
Row
34 - 35: sc in each sc (22 sc)
Switch
back to Yellow.
Row
36: In FL only, sc in each sc (22 sc)
Row
37: Evenly distribute 3 scincs throughout row (25 sc)
Row
38: (sc, sc, sc, 2sc) around (30 sc)
Row
39: sc in each sc (30 sc)
Row
40: (sc, sc, sc, sc, scdec) around (25 sc)
Row
41: (sc, sc, scdec) around, 1 sc (19 sc)
Row
42: Repeat row 41 (15 sc)
Row
43: (sc, scdec) around (8 sc)
Row
44: sc in each sc. (8 sc)
Fasten
off, leaving a long tail.
Stuff
with Polyfil.
Putting
the Stick and Sphere Together:
With
a tapestry needle, using the long tail of yellow yarn from the Stick,
pull the yarn through the scs of the opening of the stick through the
middle of the bottom of the sphere, and back through again until you
have gone all the way around. Now, go about one stitch towards the
outside of the circle and repeat. This will keep the sphere firmly on
the stick. Repeat if necessary. If you are finding your sphere isn't
staying on, and the stick isn't staying straight, you may need to
stuff more Polyfil into the stick.
Handle:
This
is that extra part on the right of the stick that sort of resembles
half of a heart. I am not sure what the purpose of it is except to
make it look cooler. Either way, I will refer to it as the "Handle"
for lack of a better term.
This
will be crocheted twice as wide as it should be, then folded in half
lengthwise and sewn together with polyfil inside to keep the shape.
With
Pink, and H Hook:
Ch
7
Row
1: sc in 2nd ch from hook, and in each st across (6 sc)
Rows
2 - 44: ch 1, turn, sc in each sc across (6 sc)
Fasten
off, leaving a long tail for sewing.
Fold
in half lengthwise, and whipstitch along the outer edge. Sew up one
short side, but leave the other open. From the open end, you will be
inserting stuffing. Using a stuffing stick (or a chopstick), push the
stuffing down into the Handle. The opening isn't very big, so a small
stick is necessary, and so is some patience. It doesn't need to be
very dense, just enough to keep some shape once it's sewn on.
Putting
the Handle and Stick Together:
Attach
the open end of the handle to the right side of the very top of the pink part of the
Stick. I sewed around twice just for good measure. Fasten off, weave
in ends.
Now,
shape the handle into the general half-heart you want (refer to
reference picture if needed). Now, leave about an inch of the handle
to curl up at the bottom of the curve of the handle. Using your
tapestry needle and pink yarn, go through the small end part of the
handle, the part that is actually attached to the stick, and through
the stick itself. Do this 3 – 5 times until it is securely
attached. Also be sure the bottom of the handle is in line with the
top of the handle, so your handle isn't sewn on crooked. Weave in
ends.
 |
| Push your needle through all three parts. |
 | ||||
| Be sure the top and bottom of your Handle are aligned |
 |
| How the bottom of the handle should look. It kind of represents a Violin Scroll. |
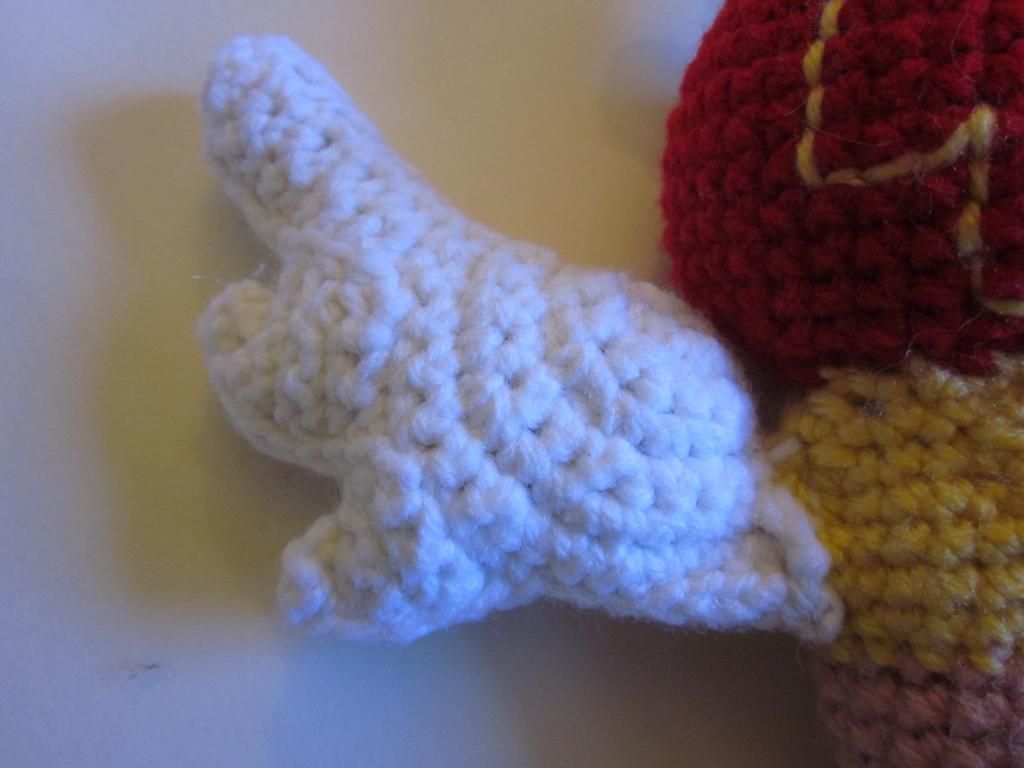
Wings (Make 4):
Wings
will be comprised of a base and 3 Feathers. It will all be one
continuous piece, so there will be no yarn cutting. Once you reach
the end of a feather, sl st down the feather towards the base where
the bottom of the previous feather is to start the next feather.
If you are having trouble visualizing the pattern as you read, there is a picture diagram below the pattern
If you are having trouble visualizing the pattern as you read, there is a picture diagram below the pattern
Base:
Row
1: Ch 2, 3 sc in 2nd ch from hook, ch 1, turn.
Row
2: 2 sc in next 2 sc, sc, ch 1, turn (5 sc)
Row
3: sc in next sc (sc, 2sc) twice, ch 1, turn (7 sc)
Row
4: (2sc, sc) twice, 3 sc, ch 1, turn (9 sc)
Row
5: (2sc, sc) twice, 5 sc, ch 1 turn (11 sc)
Row
6: (2sc, sc, sc) three times, 2 sc, ch 1, turn (14 sc)
Row
7: (2sc, sc, sc) three times, 5 sc, ch 1, turn (17 sc)
Begin
First Feather:
Row
8 - 15: 3 sc, ch 1, turn (3 sc)
Row
16: 1 sc, 1 scdec, ch 1, turn (2 sc)
Row
17: 1 scdec, ch 1, turn (1 sc)
Row
18: 1 sc, ch 1, turn (1 sc)
Sl
st down Feather #1 until you reach the base of the wing.
Begin
Second Feather:
Row
8 (Now moving across BASE of wing): 3 sc, ch 1, turn. (3 sc)
Row
9: 3 sc, sl st to side of Feather #1, ch 1, turn
Row
10: 3 sc, ch 1, turn. (3 sc)
Row
11: 3 sc, sl st to side of Feather #1, ch 1, turn
Row
12: 3 sc, ch 1, turn. (3 sc)
Row
13: 3 sc, sl st to side of Feather #1, ch 1, turn
Row
14: 1 sc, 1scdec, ch 1, turn (2 sc)
Row
15: 1 scdec, ch 1, turn (1 sc)
Row
16: sc (1 sc)
Sl
st down Feather #2 until you reach the base of the wing.
Begin
Third Feather:
Row
8 (Once again along BASE of Wing): 3 sc, ch 1, turn (3 sc)
Row
9: 3 sc, sl st to side of Feather #2, ch 1, turn
Row
10: 3 sc, ch 1, turn. (3 sc)
Row
11: 3 sc, sl st to side of Feather #2, ch 1, turn
Row
12: 1 sc, 1 scdec, ch 1, turn (2 sc)
Row
13: 1 scdec, ch 1, turn (1 sc)
Row
14: 1 sc, Sl st down feather until you reach the base of the wing, 1
sc, sl st in each st to end of wing. Fasten off.
Leave
one long tail on 2 of the 4 wings (for sewing), then weave in all
other ends.
 |
| The pen lines represent where the scs are, and the orange dots represent where you should sl st. The numbers are not accurate. This is just a visual aid to help you out with following the written pattern. |
Putting the Wings together:
On
both wings, there will be a wrong side facing outwards, and a right
side facing outwards. Place 2 of the wings right side against wrong
side, and stitch up along the bottom, feathers, and top. Flip inside
out, then fill with stuffing. Sew the last side together, except for
a small opening about the size of a penny. This will be the area used
to attach the wings to the Stick.
 |
| Now you can see where the opening should be left for attaching it to the Stick. |
Putting
it all together:
Now,
all you have to do is sew the opening on the wing onto the top yellow
portion of the Stick. The only thing you have to worry about here is
making sure it doesn't touch the handle. If you need to sew on a
higher part of the wing onto the stick for reinforcement, go ahead.
This wand is pretty big, and you wanna make sure it's sturdy.
Hooray! We're done!
Now you can transform into your favorite Sailor Scout! Well...maybe not. But you can have a nice addition to your Cosplay, or just keep it around to remind you of where you've been, where you want to go, and the imaginary people you're letting down if you just...give up.
Next time! I'm working on some patterns for deck and dice bags in Pokeball and TARDIS flavors. See you soon!

Hooray! We're done!

Now you can transform into your favorite Sailor Scout! Well...maybe not. But you can have a nice addition to your Cosplay, or just keep it around to remind you of where you've been, where you want to go, and the imaginary people you're letting down if you just...give up.
Next time! I'm working on some patterns for deck and dice bags in Pokeball and TARDIS flavors. See you soon!